- Print
- DarkLight
- PDF
Overview
Connect to your Azure Subscriptions using Work/Personal account and leverage the management operations on the supported resources. It is also possible to launch Cloud Shell and Portal from inside the application.
Cerebrata offers Interactive sign in option to add Azure Subscriptions easily. Users with delegated permission can add Azure Subscriptions either using Work/School Account or Personal Account. It is also possible to add Subscriptions using Service Principal ( Azure Active Directory App)
Add Subscription using Work/School Account
Following are the steps to add subscriptions through Work/School Account:
Click + button on Azure Subscriptions
Select Azure Default as Azure Account Host and Work/School Account as Sign In option
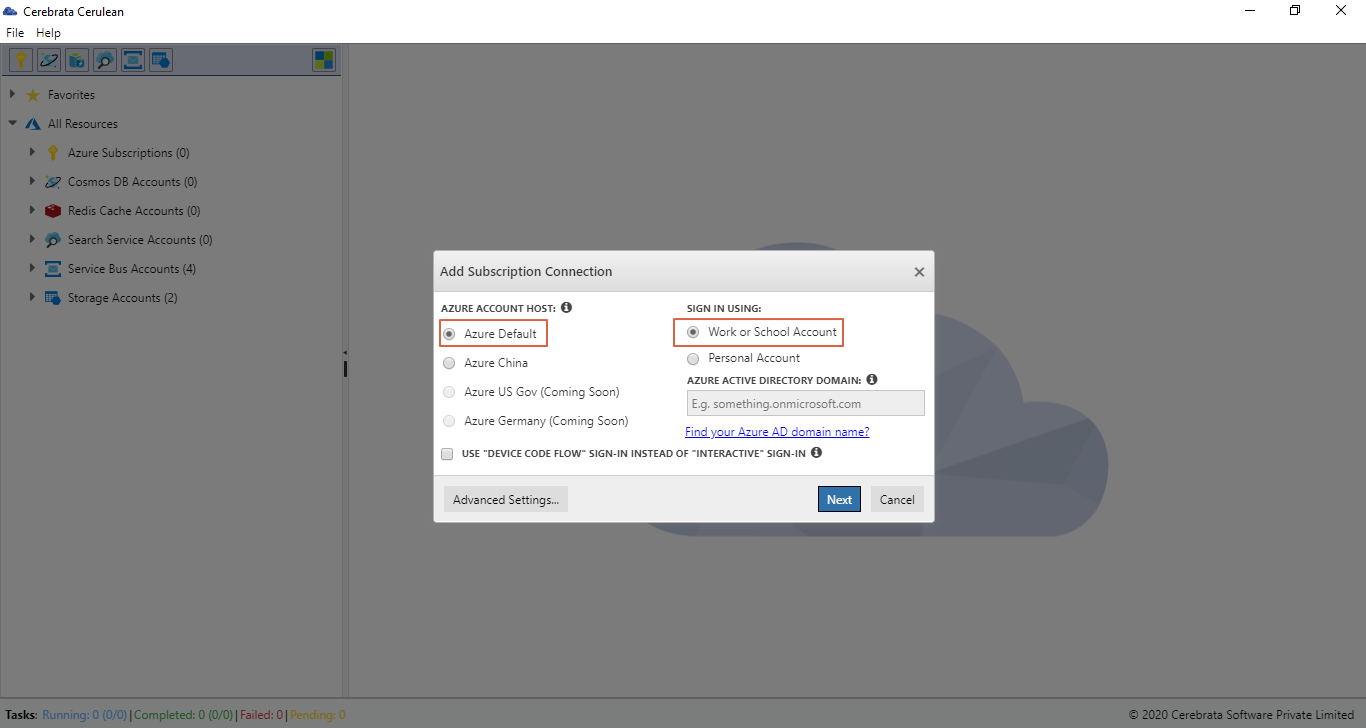
Click Next and Sign in to Work/School Account to provide access to subscriptions.
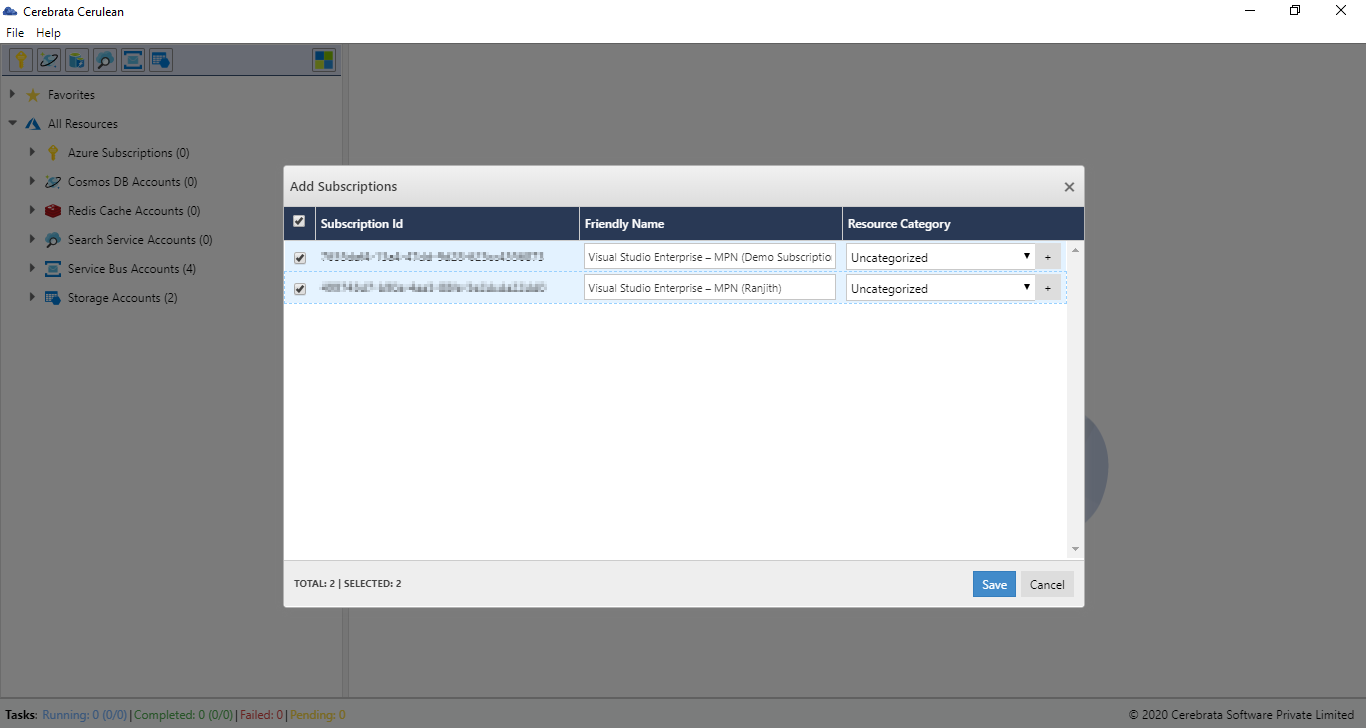
Select the appropriate subscriptions to manage using Cerebrata and clicking Save will add the selected subscriptions under Azure Subscriptions group
Add Subscription using Personal Account
Following are the steps to add subscriptions through Personal Account:
- Click + button on Azure Subscriptions
- Select Azure Default as Azure Account Host and Personal Account as Sign In option
- Provide Active directory Domain Name in AZURE ACTIVE DIRECTORY DOMAIN input box as shown below:
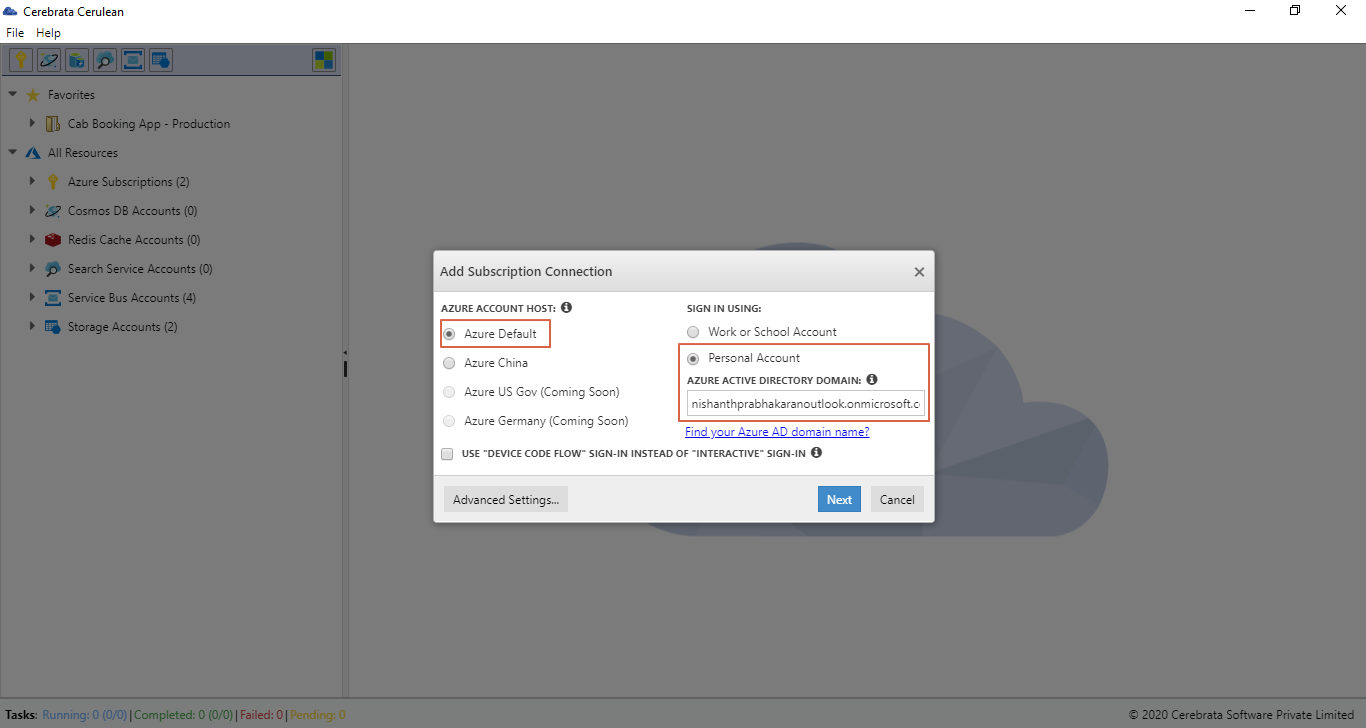
- Click Next and Sign to Personal Account.
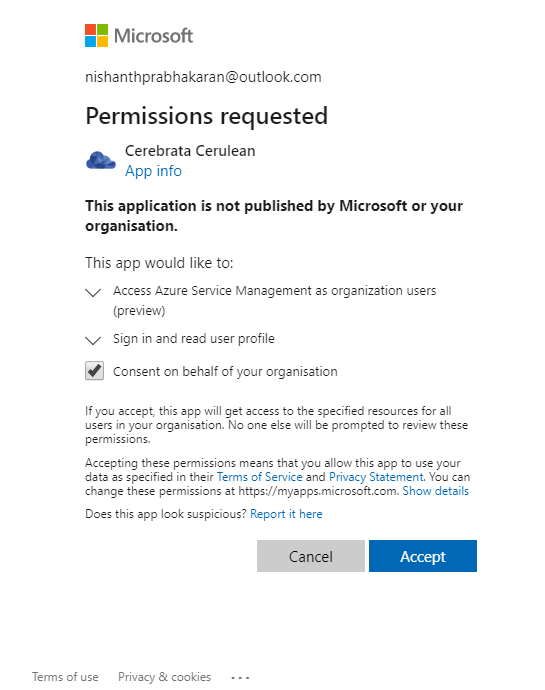
- Click Accept to create Cerebrata Application in Active Directory app registrations to access Service Management as a user
- Select the appropriate subscriptions to manage using Cerebrata and clicking Save will add the selected subscriptions under Azure Subscriptions group

Add Subscription using Azure AD Application
Users should already have the Azure Active Directory application created to follow the below steps. Click here to more about Azure AD Application creation.
It is not only possible to add subscriptions with automatically created AD application using Work/School account or personal account but also possible to add subscriptions using pre-created AD application. This helps users to use exsisting AD Application without creating new one.
Following are the steps to add subscriptions through Personal Account:
- Click + button on Azure Subscriptions.
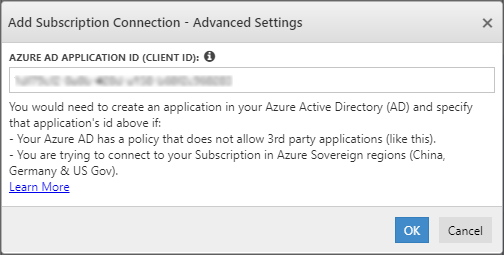
- Click on Advanced Settings button to launch a popup where specify the ID of the Azure Active Directory application created and Click Ok
- Now, choose the appropriate Azure Account Host and Sign in option.
- Follow the above steps for Work/School Account or Personal account and add subscriptions to Azure Subscription group
Device code Flow
Cerebrata also offers Device code Flow which will be very helpful if users face any difficulties with interactive sign in option mentioned above.
Following are the steps to work on Device code Flow sign in:
Click + button on Azure Subscriptions
Choose the appropriate Azure Account Host and Sign in option.
Select "USE "DEVICE CODE FLOW" SIGN-IN INSTEAD OF "INTERACTIVE" SIGN-IN" check box and click Next
Now it will open the popup with the option Copy Code and Open Browser as shown below
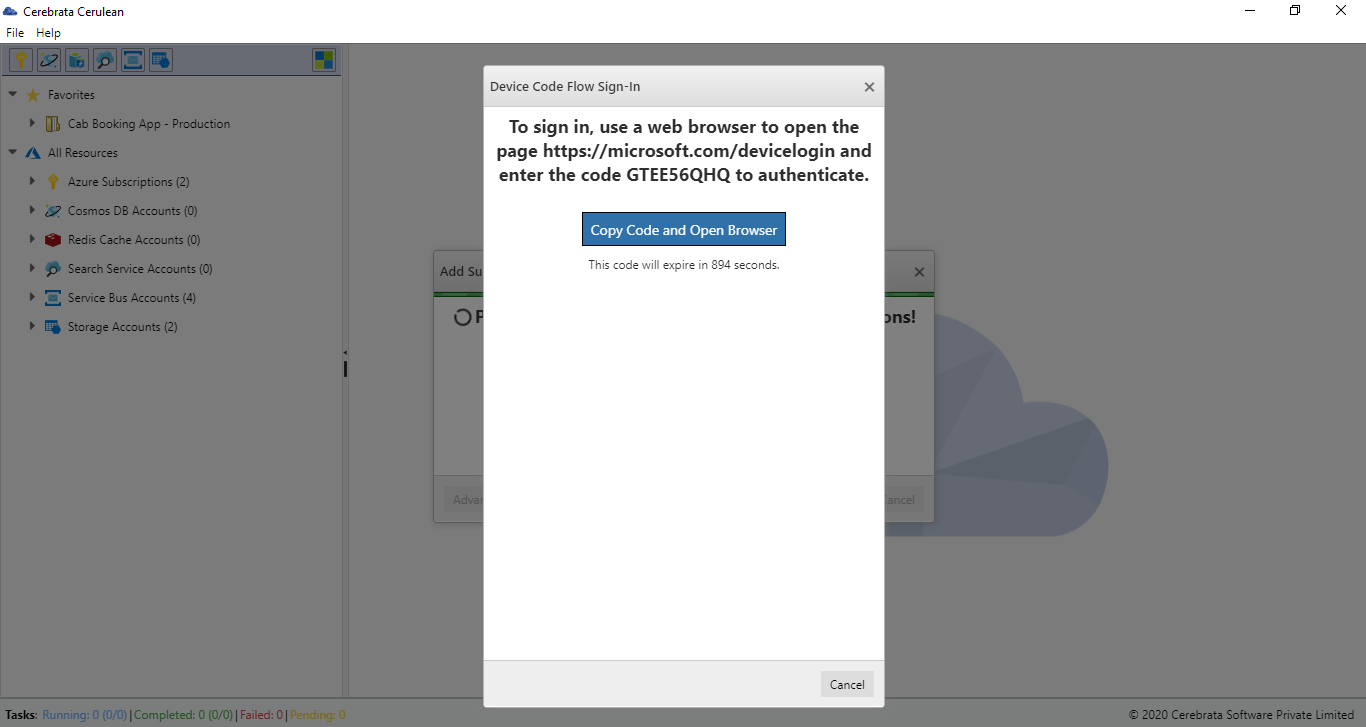
Clicking this button will open up the browser and ask for the copied code. Paste the code that is copied in the clipboard and click Next
Now, sign to the appropriate Azure account. This will open another pop up in Cerebrata asking to authenticate to the required Active directory using Device Code Flow.
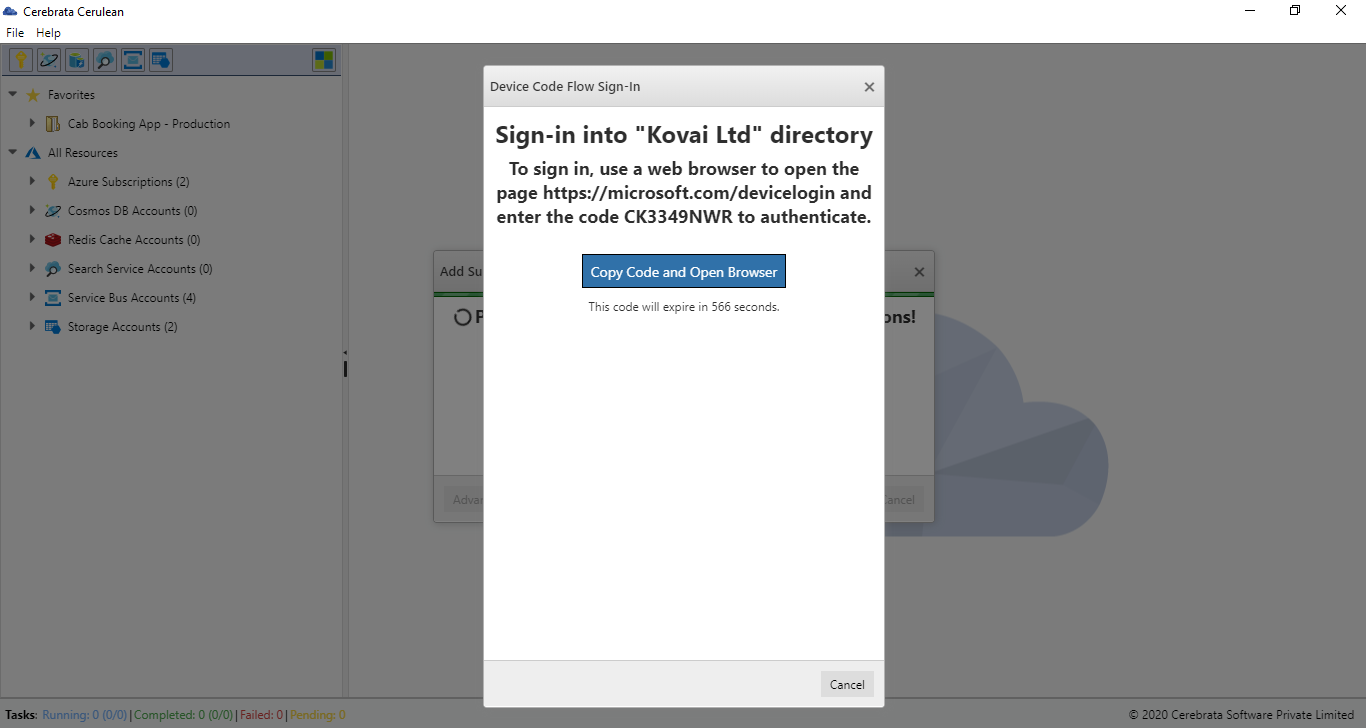
- Follow the above steps till the Authentication is done for required Active Directories.
- Once the Authencation is over, Cerebrata will list the available subscriptions. Select the required subscriptions and click Save to save the subscription to Azure Subscriptions group.
