How To Bring Your Own Azure AD App In Cerebrata
- 22 Sep 2021
- 3 Minutes to read
- Contributors

- Print
- DarkLight
- Download PDF
How To Bring Your Own Azure AD App In Cerebrata
- Updated on 22 Sep 2021
- 3 Minutes to read
- Contributors
- Print
- DarkLight
- Download PDF
Article summary
Did you find this summary helpful?
Thank you for your feedback!
How To Bring Your Own Azure AD App In Cerebrata
Cerebrata allows you to connect to and manage your Azure Subscriptions using an application created in your own Azure Active Directory (AD). This page describes the steps to create an application in your Azure AD and give permissions needed for Cerebrata to work properly.
Why is it needed?
There are certain scenarios where it is required for you to create your own application and connect to manage your Azure Subscriptions in Cerebrata using that application:
• 3rd party applications not allowed: Often an Azure AD administrator may define a policy which prohibits users of that Azure AD to grant access to 3rd party applications (like Cerebrata) created in an outside Azure AD.
• Connecting to sovereign cloud (Azure China, Azure Germany and Azure US Gov): Microsoft has rightfully put a lot of limitations on who can create an Azure Subscription in their sovereign regions. Because of these restrictions, unfortunately Cerebrata can’t have an Azure Subscription in these regions. In order to manage your Azure Subscriptions in these regions, you will need to create an application in an Azure AD in these regions.
Steps to create an Azure AD application
Following are the steps to create an Azure AD application and granting permissions required by Cerebrata.
Step 1: SignIn into Azure Portal.
First you will need to sign in into Azure Portal. Here are the links for Azure Portal:
• Azure General: https://portal.azure.com
• Azure China: https://portal.azure.cn
• Azure Germany: https://portal.microsoftazure.de
• Azure US Gov: https://portal.azure.us
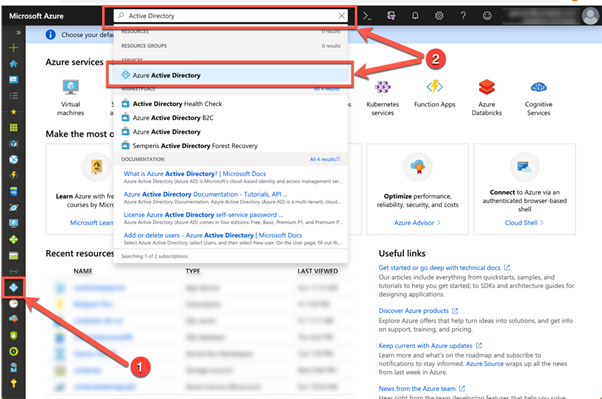
Step 2: Click on the Azure AD icon on the left-hand side menu bar or search for "Azure Active Directory".
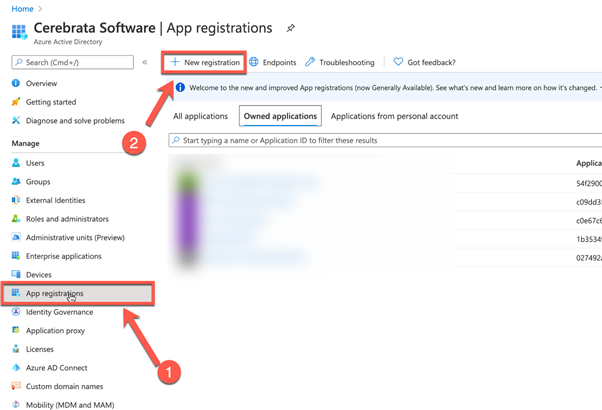
Step 3: Click on "App Registrations" in the left menu bar and then "New application registration".
Step 4: Create a new application registration.
You will be asked to provide some information for application registration.
- Application Name: For application name, please provide a name that can distinctly identify the application. For example, we used "Azure AD App for Cerebrata ".
- Who can use this application: Please select appropriate option.
- Redirect URI: For redirect URI, please specify "urn:ietf:wg:oauth:2.0:oob".

Once you have provided this information, click on "Register" button to register the application.
Step 5: Note down the "Application ID".
Once you have created the application, you will be shown the details of the application. Please note down the application id as this will be used in Cerebrata.
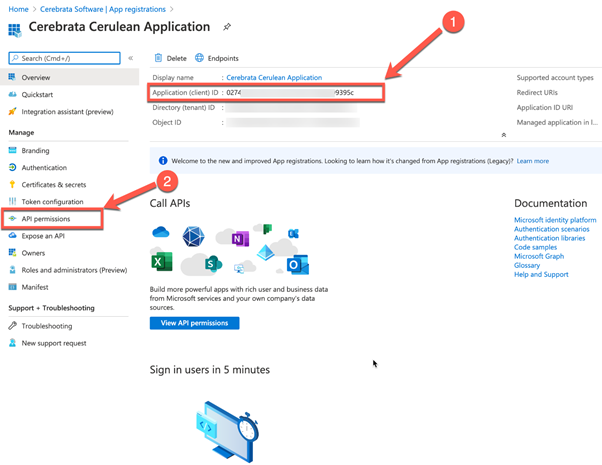
Once application id is copied to the clipboard, click on "Settings" button. You will be shown the details of the application. Next, click on "API permissions".
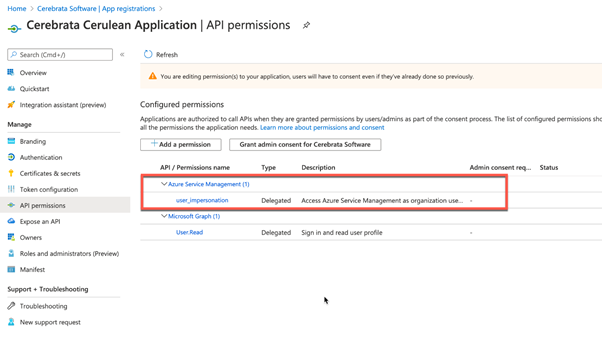
Step 6: Add required permissions.
Currently Cerebrata needs two permissions to be granted:
- Sign-in and read user profile.
- Execute Azure Service Management API.
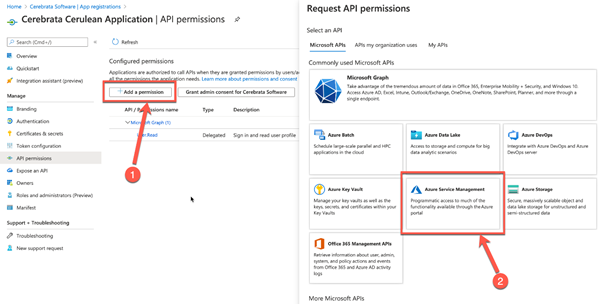
When an application is created, by default the 1st permission is granted so we just need to add 2nd permission. To do so, first click on "Add a permission" button and then click on "Azure Service Management".
Check the "user_impersonation" checkbox under Permissions and then click on "Add permissions" button.

Once this is complete, your API permissions would look like the screenshot below.
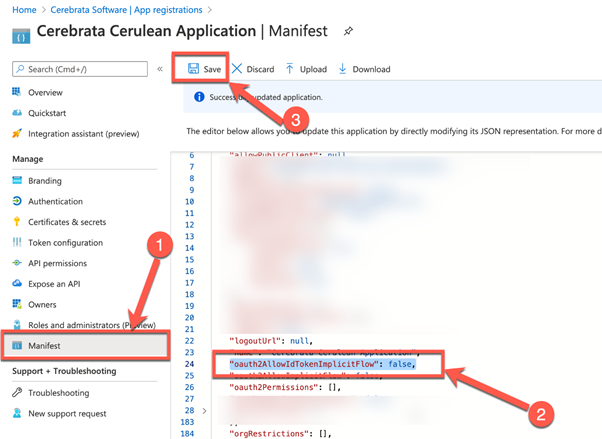
Step 7: Edit manifest to allow "id_token" in response.
Next click on the "Manifest" link and then find "oauth2AllowIdTokenImplicitFlow" in the manifest file. Set it's value to true (by default it is false) as shown below and then click "Save" button.
That’s it. Now you’re ready to use this application with Cerebrata. Please make sure that you have copied the "Application ID".
Using your Azure AD application with Cerebrata
Now that the application has been created in your Azure AD, the next step would be to use this application in Cerebrata for connecting to and managing your Azure Subscriptions.
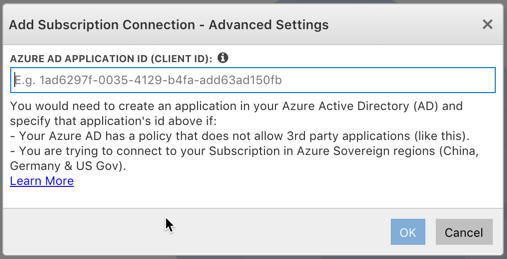
Step 1: Try to add a connection to an Azure Subscription. This will open up "Add Subscription Connection" popup.

Click on "Advanced Settings" button to launch a popup where you will specify the id of the application you just created. If you’re trying to connect to an Azure Subscription in any of the Azure Sovereign regions, clicking on the region radio button will automatically launch this popup.
Step 2: Enter the application id.
Simply enter the application id and click "OK" button to continue.
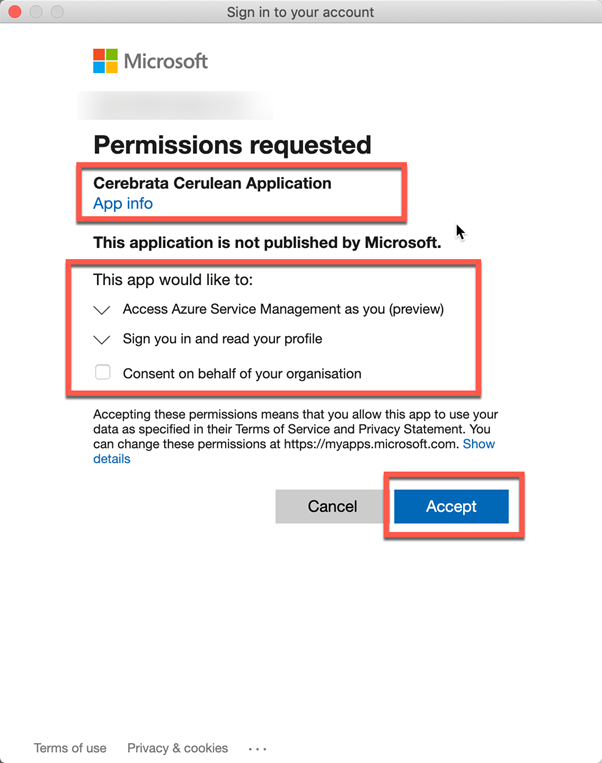
Step 3: Click on "Next" button.
That’s pretty much it! Now when you click on "Next" button, you will be asked to sign in. At this time, Cerebrata will make use of the application you created in your Azure AD instead of the default application that Cerebrata has created.
Was this article helpful?