Manage Blobs
- 01 Mar 2022
- 6 Minutes to read
- Contributors


- Print
- DarkLight
- Download PDF
Manage Blobs
- Updated on 01 Mar 2022
- 6 Minutes to read
- Contributors
- Print
- DarkLight
- Download PDF
Article summary
Did you find this summary helpful?
Thank you for your feedback!
New Item
Cerebrata offers the capability to add New blob into a Blob Container. Using Cerebrata, user can create Virtual Folders, Page blob and Append blob.
Following are the steps to create Virtual folders and Blobs:
Virtual Folder:
- Open the Blob container, select + New -> Virtual Folder to create a Virtual Folder.
- It will open a popup to enter the Name of Virtual Folder.
- Click Ok to create a Virtual Folder
Note
A virtual folder does not exist in a blob container until you upload a blob in it. Immediately after creation, you must upload blobs in this folder to persist the folder. You can also click on the "Create a zero byte blob in this folder" checkbox below to persist the folder.
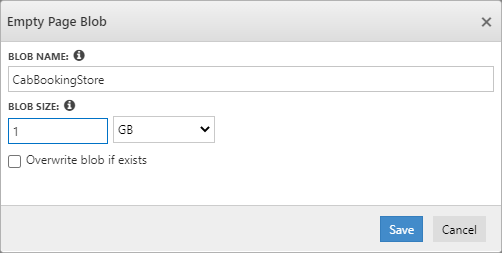
New Page/Append Blob
- Open the Blob container, select + New -> Empty Page/Append Blob.
- Provide the name of the blob in popup opened and Size if it is a page blob.
- Click Save to create Page/Append Blob
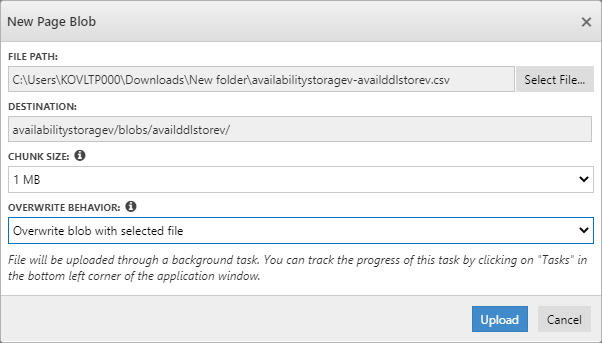
Upload Page/Append Blob
- Open the Blob container, select New -> Page/Append Blob from file.
- Select the file that needs to upload. Choose Chunk size and Overwrite Behaviour
- Click Save to upload the blob
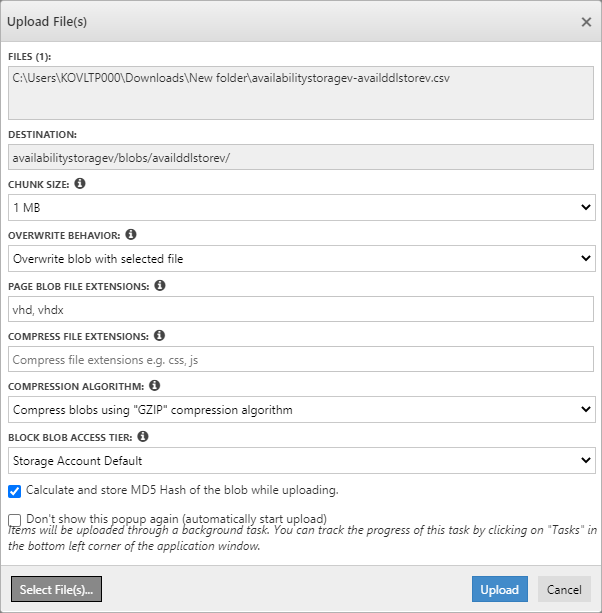
Upload Items
In addition to Blobs creation, Cerebrata also allows user to upload the files and folders from the local storage.
Following are the steps to upload Files and Folders into Blob Containers:
- Open the Blob container, select Upload -> Upload Files/Folders.
- Select the Files/Folders to be uploaded and provide Chunk Size, Overwrite behaviour, Page Blob file extensions, Compress file extensions, Block blob access tier
- Hit Upload to upload the Files/Folders
Download
Consider if the need is to backup the blobs into a local machine. Cererbrata allows users to download the files/folders into the required folders.
Following are the steps to download files/folders in Cerebrata:
- Open the Blob container, select the files/folders to be downloaded and Click Download
- In the popup opened, select the folder when the files/folders to be downloaded, provide Overwrite behaviour and hit Download to download the files/folders
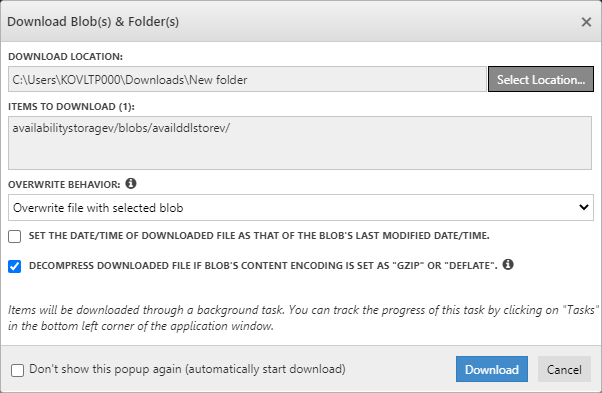
Note
If a blob is compressed with GZIP or DEFLATE compression algorithm, i.e. blob's content encoding is set as either "gzip" or "deflate", you can instruct Cerebrata to decompress it after Download automatically.
Delete Blobs
User can delete either selected files/folders or all using Cerebrata.
Following are the steps to delete the files/folders from Storage Blob:
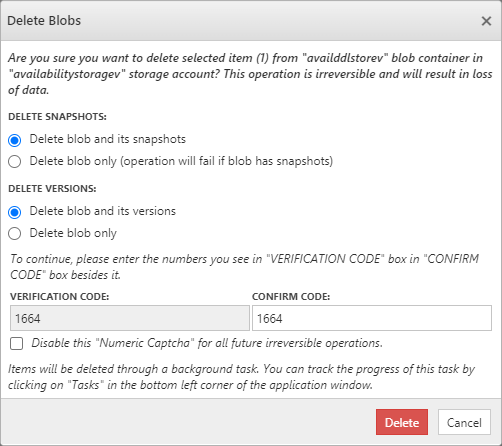
- Open the Blob container, select the files/folders to be deleted and Click Delete
- It will open a popup and ask the user to enter the numbers in the "VERIFICATION CODE" box into the "CONFIRM CODE" box beside it.
- Once the Verification code is entered, Click Delete to delete the appropriate files/folders
Access Tier
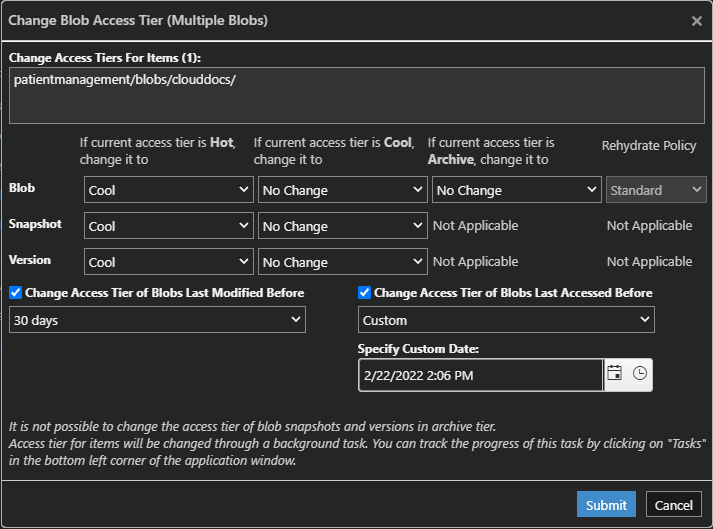
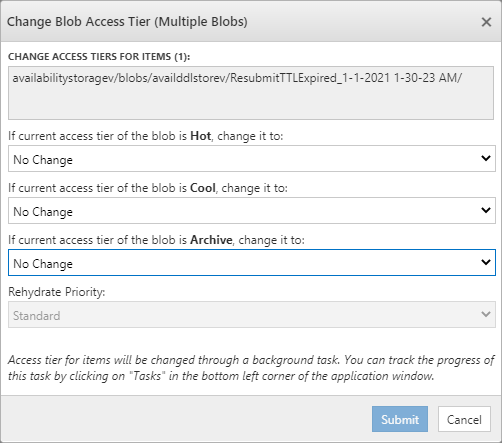
Consider a scenario where the user needs to change the access tier of all blobs in a blob container from "hot" to "archive". By default, Azure Storage only allows user to change the access tier of an individual blob. Cerebrata includes a neat convenience utility using a single click user that can change the access tier of all blobs in a blob container. For example, in a single click user can move all blobs in a blob container from "hot" access tier to "cool" or "archive" access tier.
The users can also specify additional conditions like changing the access tier of all the blobs from "hot" to "cool" that are not modified or accessed for the past 30 days.
Following are the steps to set Access Tier for blobs:
- Open the Blob container, select the files/folders to update the access tier and Click Access Tier
- In the Change Blob Access Tier popup, set the access tier conditions based on the need.
- Click Submit to set the access tier
New Snapshot
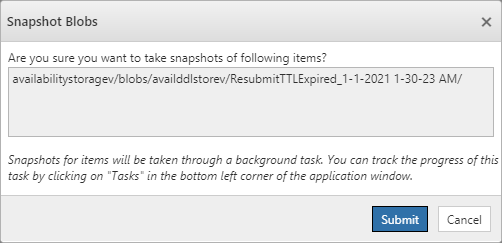
By default Azure Storage allows users to take a snapshot of an individual blob in a blob container. Cerebrata includes a utility using which, in a single click user can take a snapshot of the entire blob container, i.e. it will take the snapshot of all blobs in that blob container.
Following are the stope to create a Snapshot for Blobs:
- Open the Blob container, select the files/folder and Click New Snapshot
- Click Submit in the popup opened to add a snapshot to the select files/folders
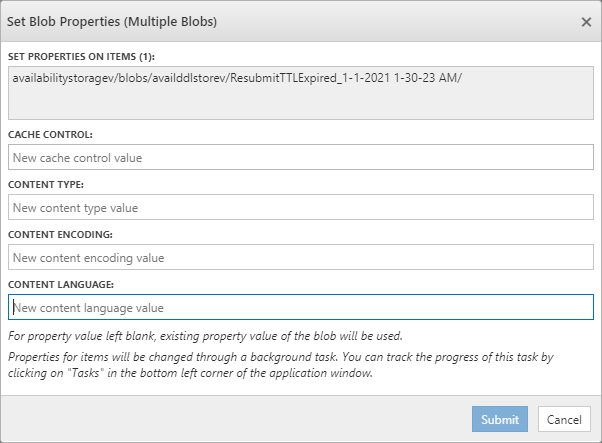
Set Properties
Consider a scenario where the user needs to change the "cache-control" property of all blobs in a blob container. By default, Azure Storage only allows user to change the property of an individual blob. Cerebrata includes a utility using a single click that can change properties like cache control, content-language, content-encoding, and content type of all blobs in a blob container.
Following are the steps to define the properties of blobs:
- Open the Blob container, select the files/folders to set properties and Click Set Properties
- It will open a popup and ask the user to enter Cache-control, Control Type, Content-Encoding and Content-Language.
- Once the properties are provided, click Submit to set the properties.
Search
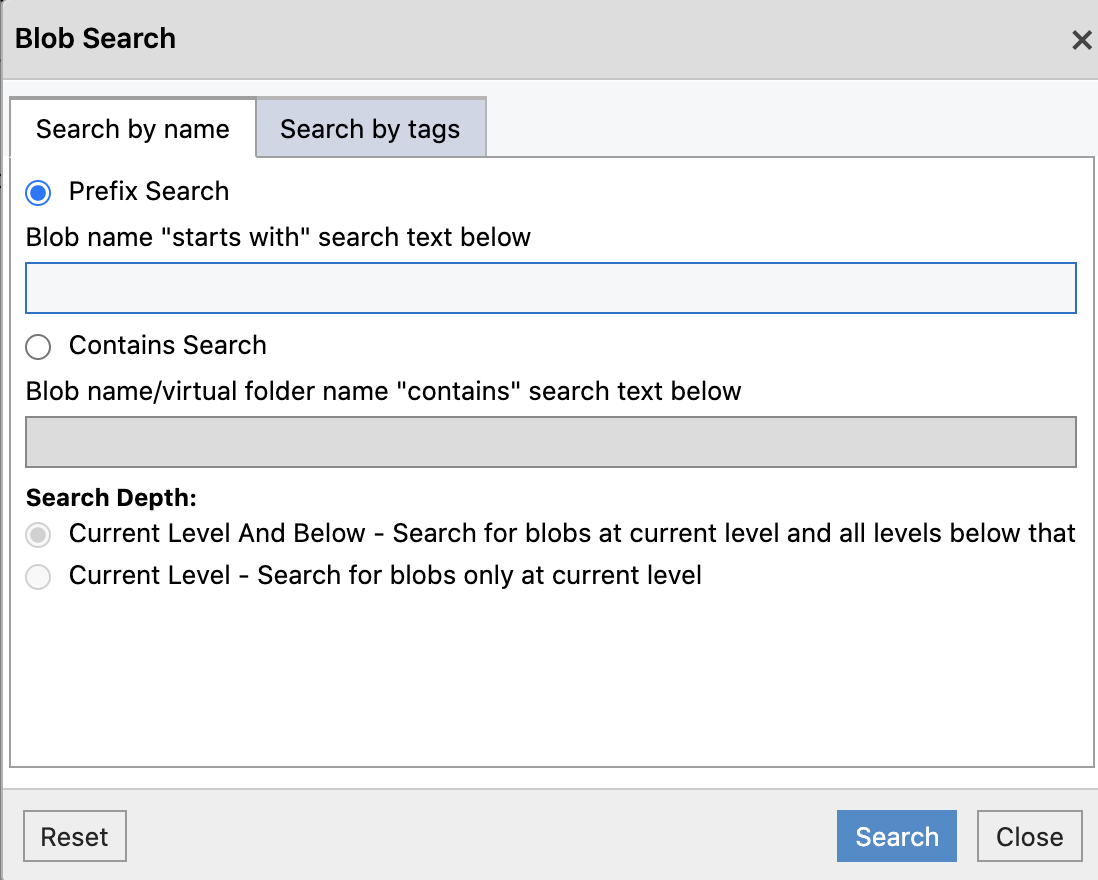
Consider a scenario where the user has too many blobs in a blob container and wants to find out certain blobs. Cerebrata includes a convenient utility using which user can search for blobs in a blob container.
It allows searching for blobs using either a "prefix" (i.e. find all blobs, names of which begin with certain characters) or a "contains" search (i.e. find all blobs, names of which contain certain characters).
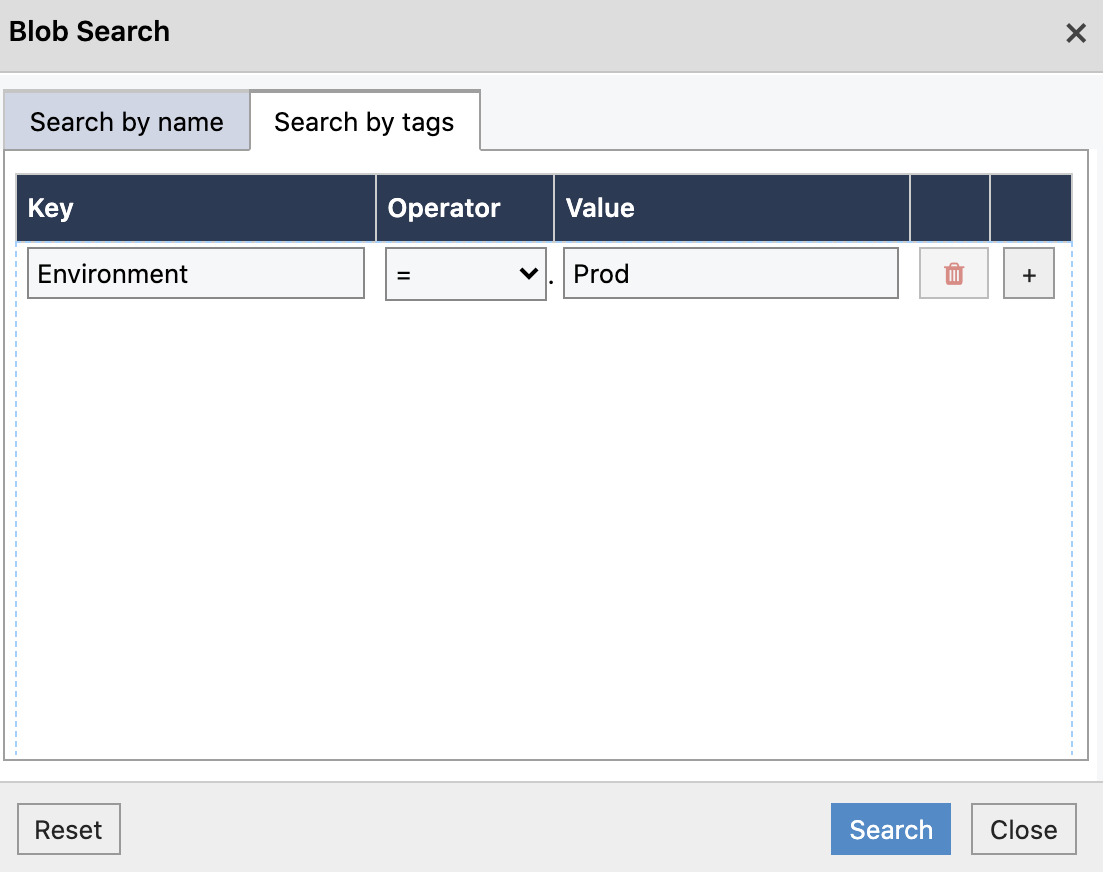
It is also possible to search the blobs based on the tags defined on them. The operators that can be used in tag based search are =, >, >=, < and <=.
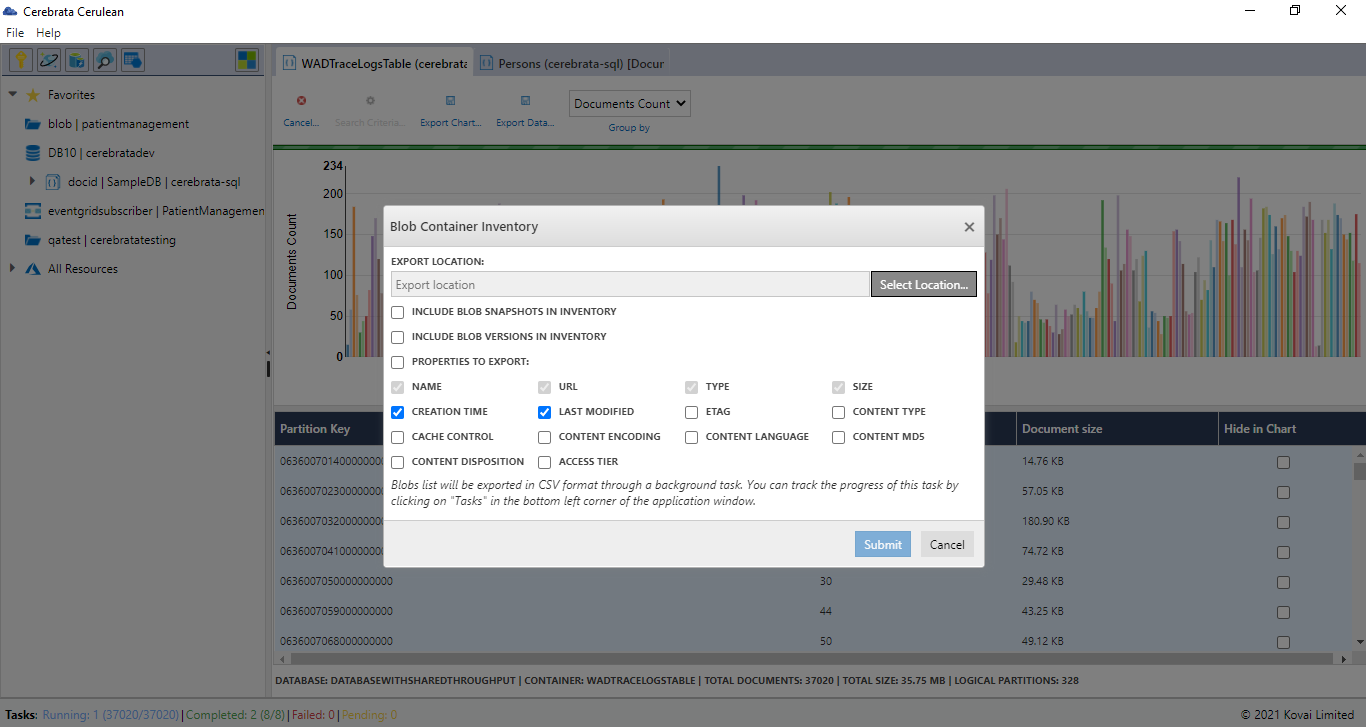
Blob container Inventory
A user can download details about all the blobs as a CSV file in a container through blob container inventory. It is also possible to include information about blob snapshots and versions along with the blob. Required properties that must be included in the CSV can be selected.
Settings
The user can enhance the management part of Blob Storage in Azure Storage Account with Cerebrata's settings. To leverage these settings,
General Settings
Navigate to Files > Settings > Application Settings > Storage Settings> Blob Service
User can define the maximum number of blob containers to fetch from a storage account in a single request. The value provided must be greater than zero and less than or equal to 1000.
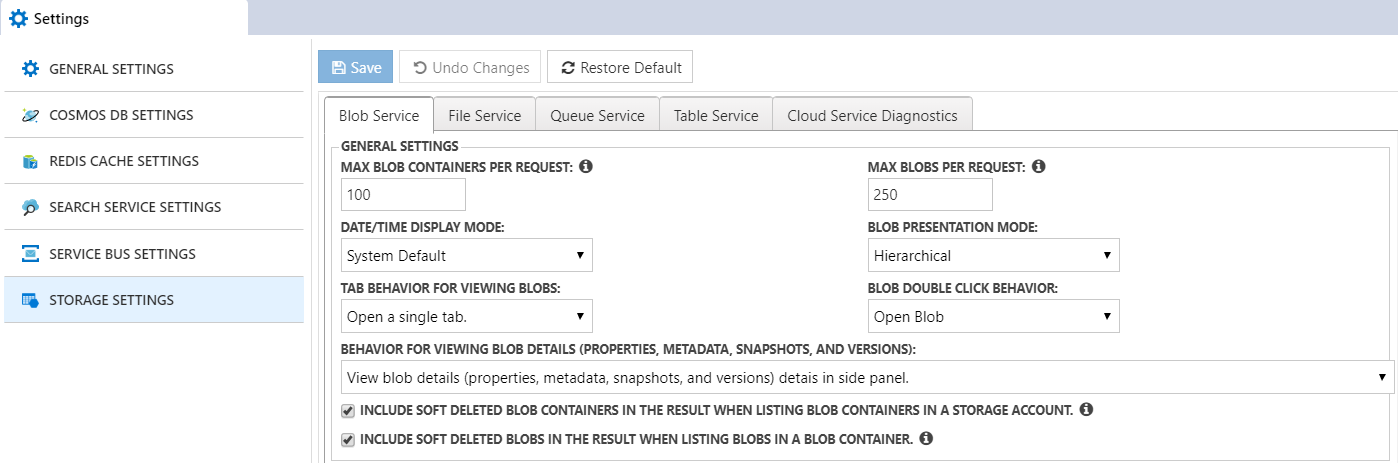
User can define the maximum number of blobs to fetch from blob containers in a storage account in a single request. The value provided must be greater than zero and less than or equal to 1000.
User can include soft deleted blob containers and blobs while listing blob containers in a storage account.
Set Tab Behaviour for opening the files and Blob Double Click Behaviour to view the files in different panel views.
Upload Settings
User can split the blobs into chunks and size of these chunks can be specified under Chunk Size tab. These chunks will be uploaded in parallel for faster upload.
Set Overwrite Behaviour to specify how application should behave if a blob with same name as that of the uploaded file exists.
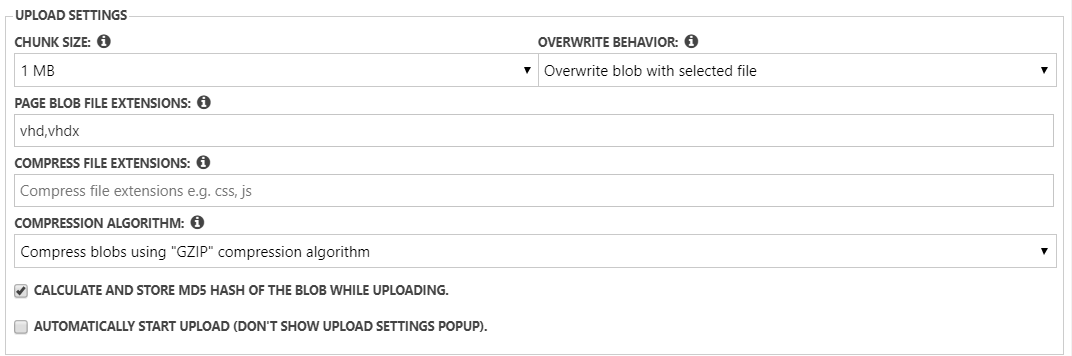
User can set compressed file extensions , compression algorithms and add Page Blob File Extensions.
Calculate and store MD5 hash of the blob while uploading and automatically start uploading
Download and Copy Settings
Set the date/time of downloaded file as that of the blob's last modified date/time by enabling the check box.
User can decompress downloaded file if blob's content encoding is set as "GZIP" or "DEFLATE".
Also, user can automate the download process by enabling the Automatically Start Download option.

Set Overwrite Behaviour to specify how application should behave if a blob with same name as that of the copied blob exists.
Enable Check If Source Items are Copied Completely option to fetch target blob's properties and check its copy status to ensure source items are copied completely.
Also, user can automate the copy process by enabling the Automatically Start Copy option.
Was this article helpful?