Manage Redis Cache Account
- 16 Sep 2021
- 3 Minutes to read
- Contributors

- Print
- DarkLight
- Download PDF
Manage Redis Cache Account
- Updated on 16 Sep 2021
- 3 Minutes to read
- Contributors
- Print
- DarkLight
- Download PDF
Article summary
Did you find this summary helpful?
Thank you for your feedback!
Overview
Manage databases, and keys in the Redis Cache accounts through a user interface or in-built console. Also perform basic management operations on the accounts.
View Properties
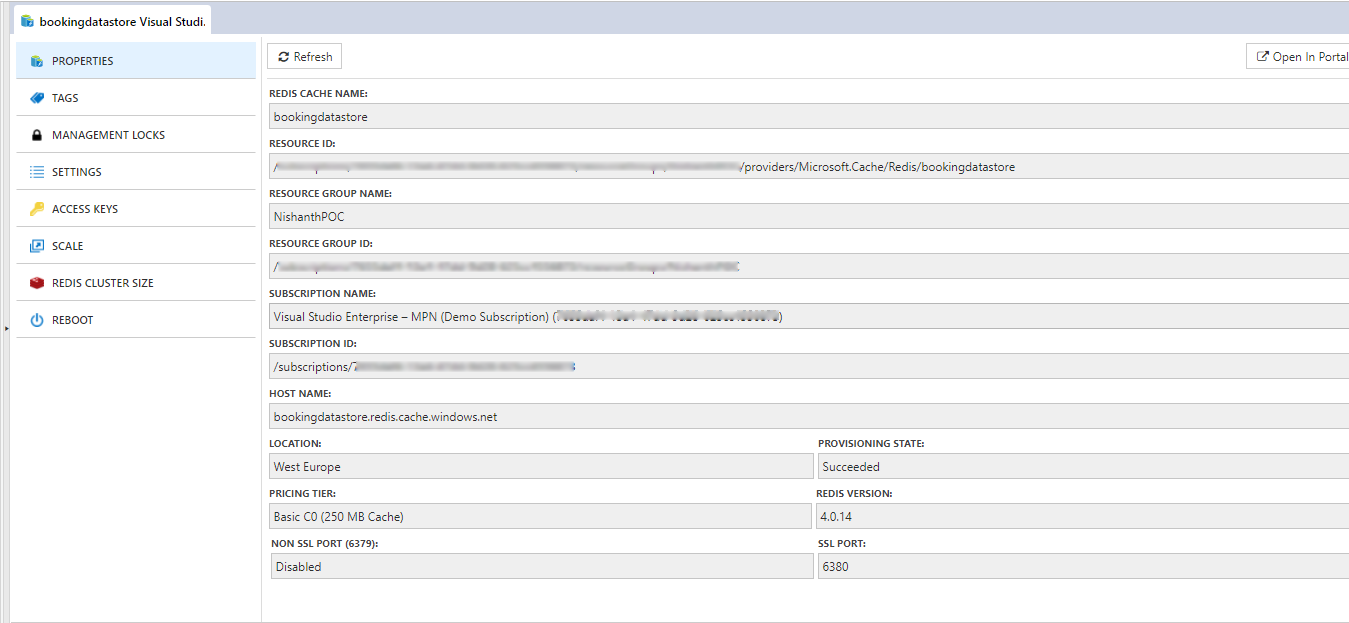
Consider if the need is to check if the Redis Version or the Provisioning State is succeeded or failed. Cerebrata allows user to view properties of Redis Cache like Pricing Tier, Subscription Id and more. Following are the steps to view the properties of Azure Redis Cache:
- Select the context menu of the appropriate Redis Cache and click Manage
- Click Properties in the window to view the Redis Cache properties as shown below
Manage Locks
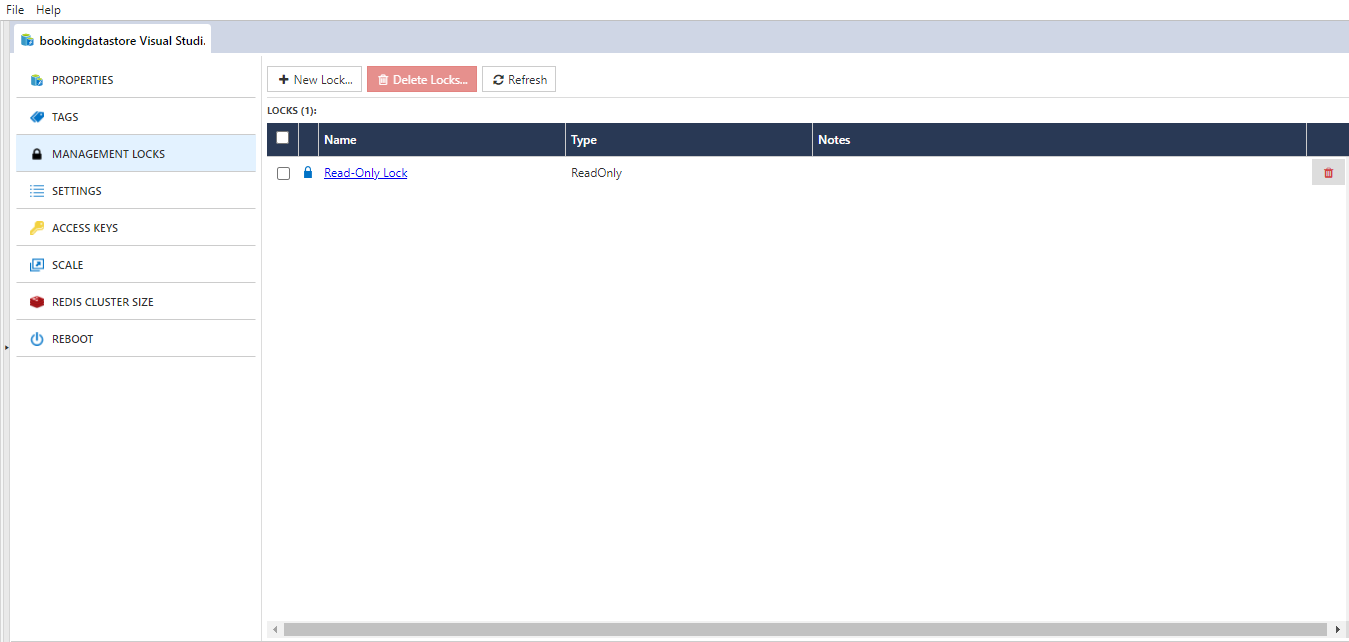
The administrator may need locking mechanisms for subscriptions, resource groups or resources to prevent other users from accidentally deleting or modifying critical resources. Using Management locks, the user can lock the subscription or resources in Azure. Cerebrata also supports Management locks which will be handy for developers or admins to quickly navigate and lock the appropriate resources without switching to the Azure portal. User can create, modify and delete Locks from Cerebrata.
Following are the steps to manage Locks for Azure Azure Redis Cache in Cerebrata:
- Select the context menu of the appropriate Azure Redis Cache and click Manage
- Click Management Lock, which will list the existing locks of the specified Redis Cache
Note
Click here to know more about Management Locks in Azure
Manage Tags
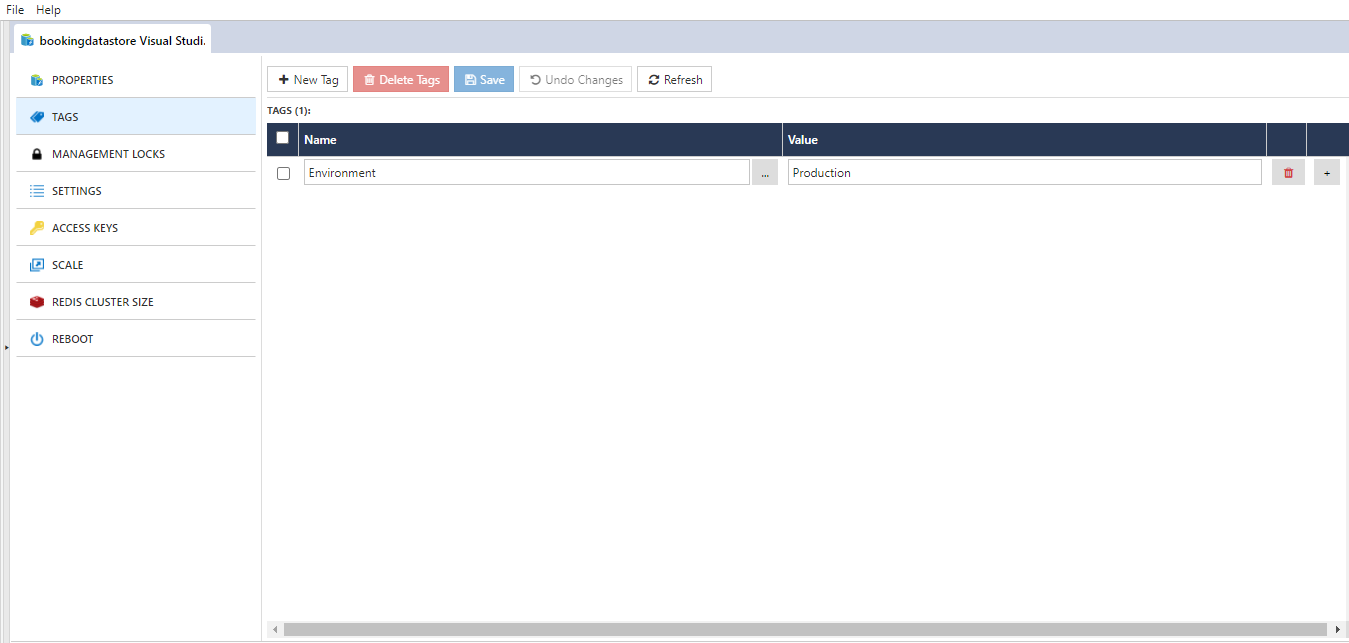
Cerebrata allows user to manage tags of a Redis cache account. User can list tags defined on a Redis cache account, Add a new tag, update a tag value or delete one or more tags for that account.
Following are the steps to manage Tags for Redis Cache:
- Select the context menu of the appropriate Azure Redis Cache and click Manage
- Click Tags, which will list the existing Tags of the specified Redis Cache
- Click New and Key-Value as required
- Click Save to save the Tag
Access Keys
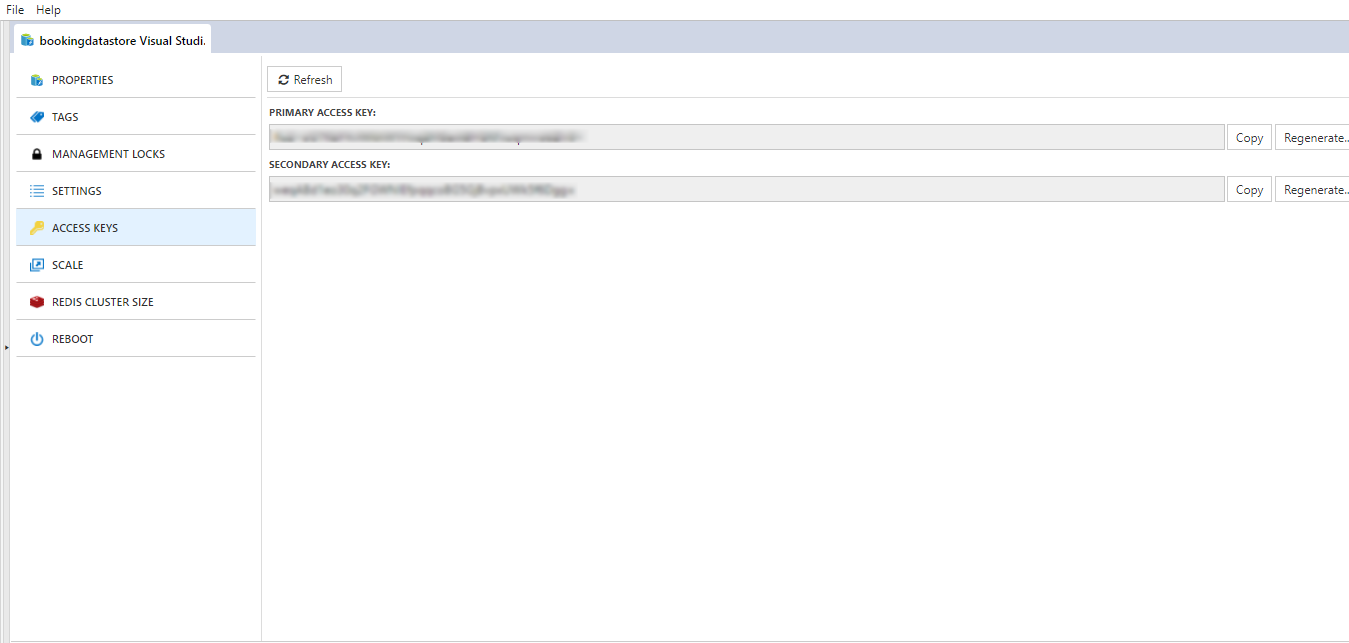
Access keys are the 512-bit secured keys used to authorize access to data in Redis Cache via Shared Key authorization. Cerebrata provides the option to get these access keys. It also includes the ability to regenerate new Access Keys.
Following are the steps to manage Access Keys for Azure Redis Cache in Cerebrata:
- Select the context menu of the appropriate Azure Redis Cache and click Manage
- Click Access Keys, which will list the existing Access Keys and Connection strings available.
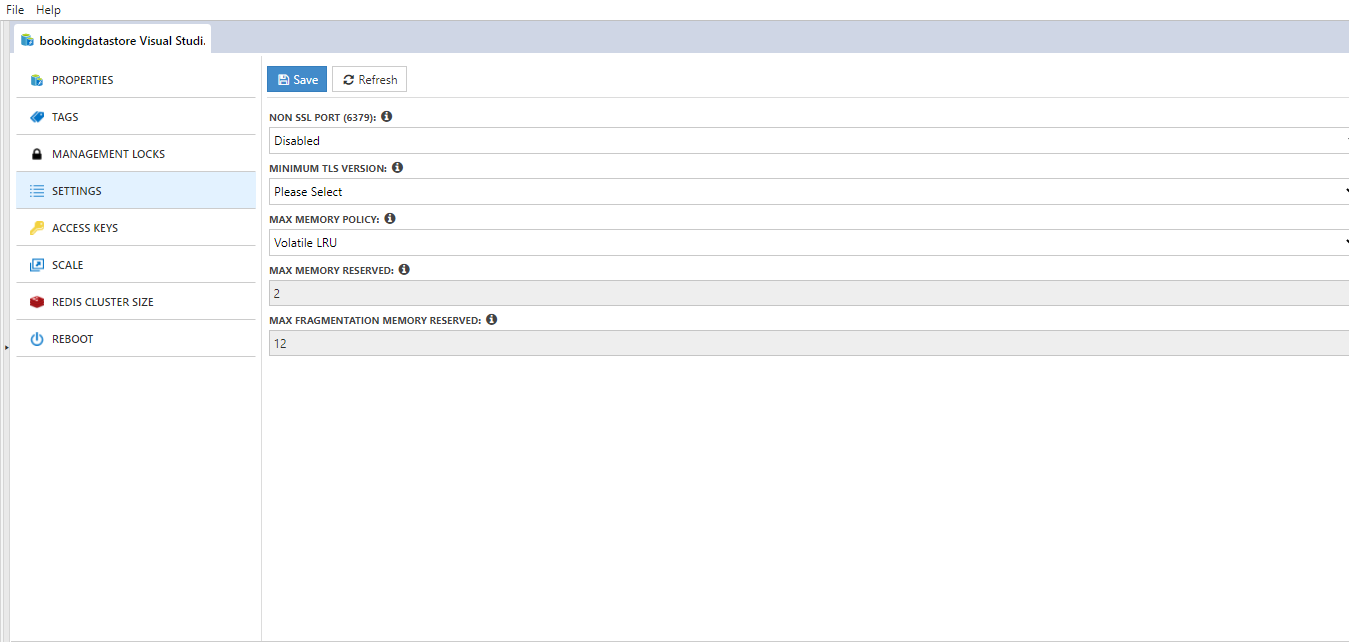
Change Settings
User can choose the Minimum TLS version or Max Memory Policy of the Azure Redis Cache from Settings. It is also possible to only allow the requests through a secured connection to the Storage Account.
Following are the steps to change the Replication and Access Tier of a Redis Cache:
- Select the context menu of the appropriate Azure Redis Cache and click Manage
- Select Settings. Change Replication and Access Tier as required.
- Click Save to the settings
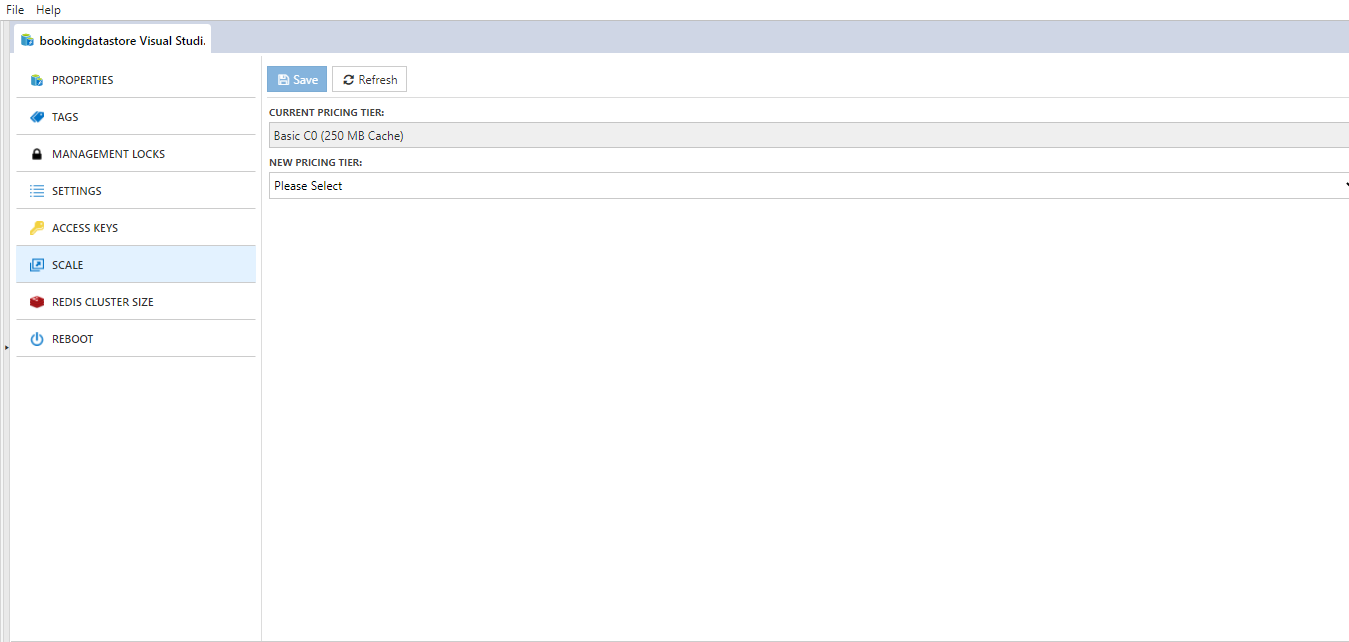
Scale
Using Cerebrata, the user can easily change the scale of a Redis cache account by changing the pricing tier of the account, e.g. change pricing tier from basic to standard, standard to premium etc.
Following are the steps to scale up the Azure Redis Cache:
1.Select the context menu of the appropriate Azure Redis Cache and click Manage
2. Select Scale. Change New Pricing Tier.
3. Click Save
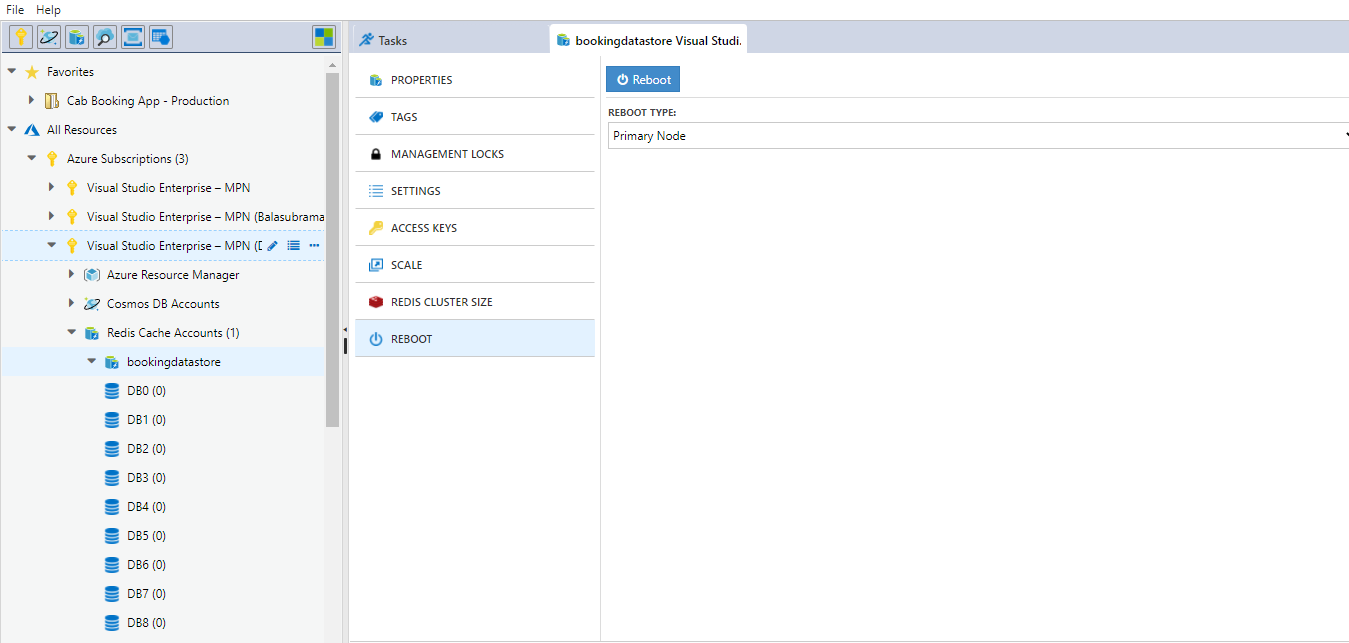
Reboot
Using Cerebrata, the user can even reboot a Redis cache server from inside the application.
Following are steps to reboot the Redis Cache server:
1.Select the context menu of the appropriate Azure Redis Cache and click Manage
2. Select Reboot. Choose Reboot Type.
3. Click Reboot to reboot the server
Delete All Keys
Using Cerebrata, the user can delete all keys from all databases in your Redis server in a single click. This Delete operation will perform the FLUSHALL command that deletes all the Redis Cache database keys.
Following are the steps to delete All Redis Cache Keys:
1.Select the context menu of the appropriate Azure Redis Cache and click Delete All Keys
2. It will open a popup and ask the user to enter the numbers in the "VERIFICATION CODE" box into the "CONFIRM CODE" box beside it.
3. Once the Verification code is entered, Click Delete to delete all the Key in the selected Redis Cache
Was this article helpful?