Manage Tables
- 16 Sep 2021
- 4 Minutes to read
- Contributors

- Print
- DarkLight
- Download PDF
Manage Tables
- Updated on 16 Sep 2021
- 4 Minutes to read
- Contributors
- Print
- DarkLight
- Download PDF
Article summary
Did you find this summary helpful?
Thank you for your feedback!
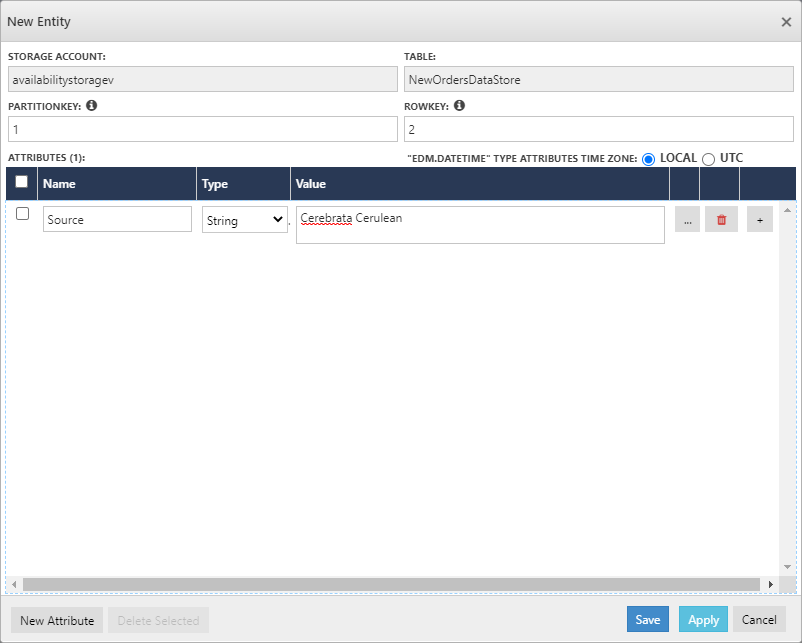
New Entity
Using Cerebrata, the user can add a new entity to a table. It supports the "Edm. Binary" type entity attribute that enables users to select a local computer file. Cerebarata automatically converts that file's contents to a Base64 encoded string (as expected by the table service).
Following are the steps to add a new entity to Storage Table:
- Open the required Storage Table, Click New Entity
- It will open a popup to input RowKey, Partition Key and Attributes.
- Click New Attribute to add a new attribute for an entity
- Click Apply or Save to create an entity in a Storage queue
Copy/Duplicate Entities
When the need is to duplicate an entity with a different RowKey, the user can fulfil this need using the Copy/Duplicate Entities option in Cerebrata.
Following are steps to copy/duplicate an entity using Cerebrata:
Duplicate Entity
- Open the required Storage Table and retrieve entities by Executing queries
- Select the entities to be duplicated.
- Click Copy and Select Copy Entity
- In the popup opened, change the attributes like PartionKey, RowKey and other attributes that need to be changed
- Click Save to duplicate the entity.
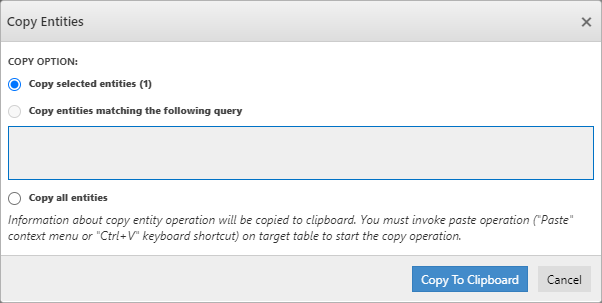
Copy Entity
- Open the required Storage Table and retrieve entities by Executing queries
- Select the entities to be copied to another table.
- Click Copy and Select Copy Entity
- In the popup opened, Choose the Copy Option as required and Click Copy to Clipboard to the entities.
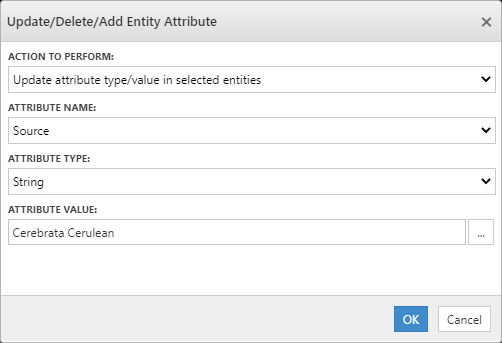
Multi-Edit
Consider if the migration process is going on and the developer needs to add/ update/ delete the existing table attribute. Here comes Multi-Edit in Cerebrata. Using Multi-Edit, user can easily migrate the existing data in Storage Table with updated data.
Following are the steps to perform multi-edit in Cerebrata Cerulea:
- Open the required Storage Table and retrieve entities by Executing queries
- Select the entities to be edited.
- Click Multi-Edit, It will open a popup to select Edit operation like Add/Delete/Edit. Choose the required option and provide attribute details like Name, Type, Value
- Click Ok -> Update Entities to update the selected Entities
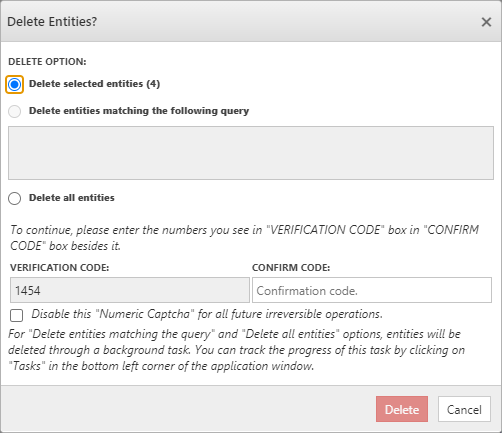
Delete Entities
User can delete the selected entities of a Storage Table from Cerebrata.
Following are the steps to delete the Entities from Storage Tables:
- Open the required Storage Table and retrieve the Entities by executing the Query.
- Select the entities that need to be deleted. and Click Delete Entities
- It will open a popup and ask the user to choose the Delete Option and enter the numbers in the "VERIFICATION CODE" box into the "CONFIRM CODE" box beside it.
- Once the Delete Option and Verification code is entered, Click Delete to delete the appropriate messages
Download
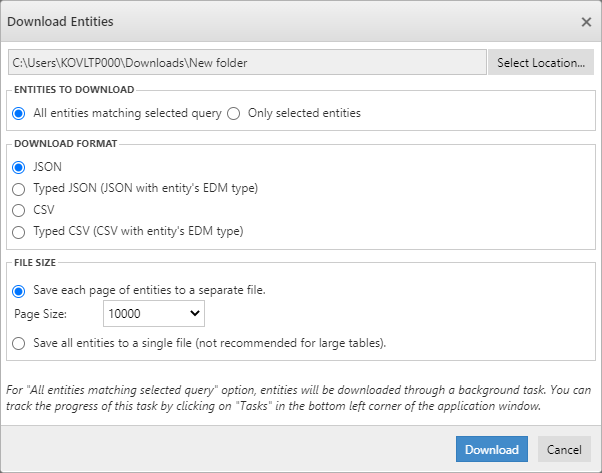
Along with Copy& Paste, the user can even select one or more of displayed entities (or all entities matching query criteria) and download them to the local computer. Cerebrata enables to download of the entities in JSON, CSV or Typed CSV format.
Following are steps to download entities in a Storage Table:
- Open the required Storage Table and retrieve the Entities by executing the Query.
- Select the entities that need to be downloaded. and Click Download
- In the Popup opened, Select the Folder where to target files should be downloaded
- Choose Entities to Download, Download Type and File Size
- Click Download to download the selected entities
Query Builder
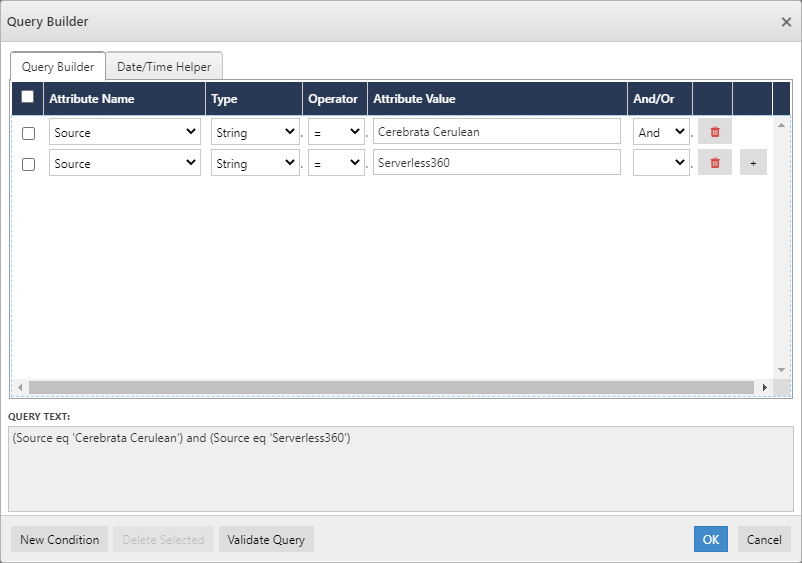
Query builder (designer) is another utility in Cerebrata with which user can construct the OData queries against tables with great ease. It makes the user select the attributes to create a query, specify the operator (equal, not equal, greater than, less than etc.), specify their values based on the attribute type and specify logical connectors (and, or), and query builder will build the OData query for users.
It also includes date/time utilities using which the user can choose from a set of predefined dates, and the query builder will take care of necessary conversion and formatting.
Following are the steps to form a Query using Query Builder:
- Open the required Storage Table and Click Query Builder
- It will open a Popup name Query Builder, Click New Condition
- Provide Attribute Name, Type, operator, Value and Condition operator(And/Or). Click Validate Query to validate Query.
- Choose Date/Time Helper to configure Date time aggregation based Query.
- Click Ok -> Execute Query to execute the formed Query.
Save/ Manage Queries
Cerebrata offers this nifty productivity feature that enables the user to save the commonly used queries inside the application to reuse the Query anytime. Using the Query Manager, the user can edit any saved query by simply changing the query text and/or parameters. It also offers the option to export queries in JSON format and import them back.
Following are the steps to save/manage queries in Storage Table:
Save Query
- Open the required Storage Table and form a query to be saved using Query Builder
- Click Save Query and Provide Friendly Name, check Default query checkbox to make the Query as default whenever opening the Storage Table
- Click Save to save the Query.
Manage Queries
- Open the required Storage Table and click Manage Queries
- It will list all the existing saved queries. Click New Query to form and add a new query. It also allows to choose Attributes and Maximum number of entities to be shown while executing the Query
- It also allows to Delete, Export or Import queries.
- Click Save to save the queries

Note
Use Query Help to learn how to form an OData query to retrieve required Entities. Click here to know more about OData Query
Customize View
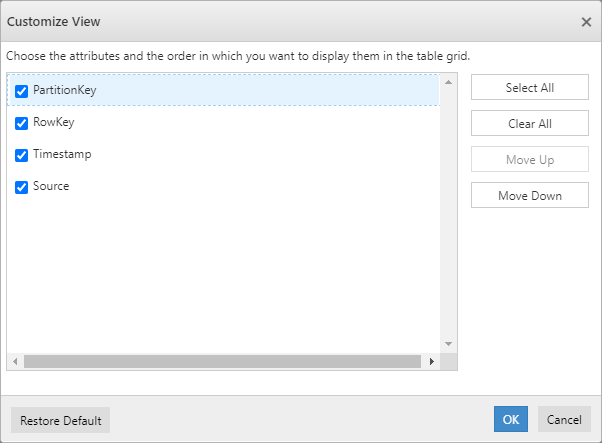
Using Cerebrata, user can customize the view of listed entities. User can specify the attributes of entities (like PartionKey, RowKey, TimeStamp and Other custom Attributes) that needs to be shown in the grid.
Following are the steps to customize the view of the grid:
- Open the required Storage Table. Click Customize View
- It will open a popup where the user can choose the columns and the order in which you want to display them in the table grid.
- Click Ok to reflect the changes on the grid.
Was this article helpful?